Get better results keying and tracking screens with these simple productions tips
Ever wonder what you can do to make replacing screens in video footage
easier? Want to get a cleaner result in the final video with less work
in post? Here are 5 tips will help you maximize your success by shooting
the footage with VFX in mind.
Tip # 1
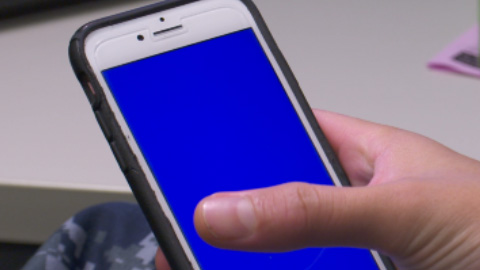
Decrease the screen’s brightness
It may seem simple, but by turning down the screen brightness on the
device you are shooting, you will minimize spill on actors’ hands and
faces. This is especially true if you are replacing the screen on
someone holding and interacting with a phone. There’s no need for the
screen to be bright as long as the camera can pick up the color to be
keyed.
Tip # 2
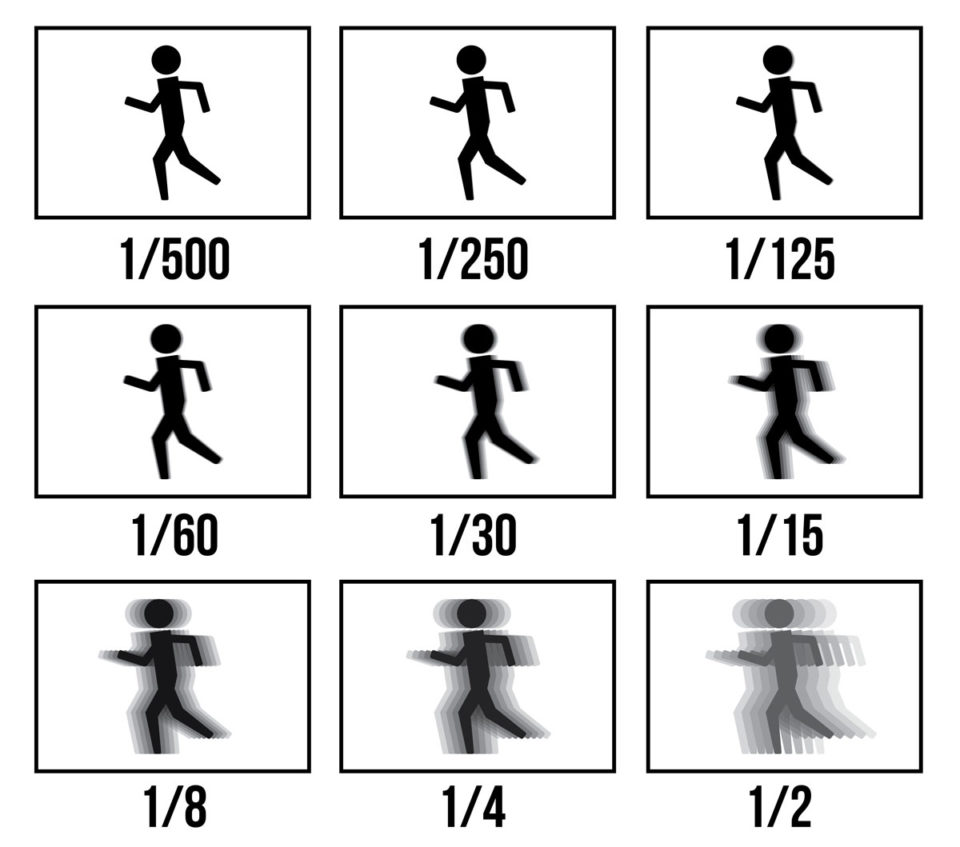
Shoot at a higher shutter speed
This might be a bit tricky if the device you are shooting has a slower refresh rate than the shutter speed of your camera, but a short exposure time means less motion blur. The less blur from movement, the easier an object is to track and key. You can re-introduce motion blur in post with Reel Smart Motion Blur to make the shot feel natural again, but you can never take away motion blur from the original footage. Keep the footage as crisp as possible in camera.
Tip # 3
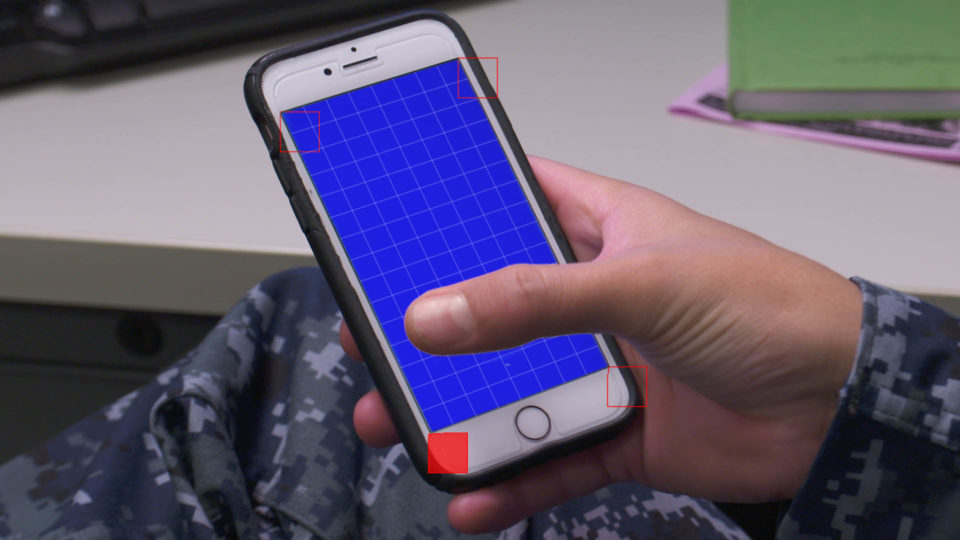
Ditch the tracking markers
Unless you’ll be covering up more than 2 of the corners on a screen or doing wild perspective-changing tilts with the device, tracking markers aren’t usually necessary for screen replacement. There’s enough contrast at the corner of the screen to use those for tracking, so don’t waste time putting any extra markers on the screen itself. In some cases doing so can actually make keying harder because the screen won’t be all one color.
Tip # 4
Leave a little black border
Rather than filling the entire screen with the color to be keyed out, leave a small border (between 2% and 5% of the screen size) in the on-screen image. This will allow for a bit of bleed that is inevitable with keyed footage. You don’t want the screen to look like it extends outside the bounds of the actual screen, and you also don’t want to end up with a halo of color surrounding the screen. This little trick will help solve both those issues.
Tip # 5
Avoid covering up corners
This one isn’t always possible depending on the requirements of the
shot, but the more corners that stay visible throughout a shot, the
better. Strive to have 3 corners visible at all times. You can get away
with less, but if you end up covering up all 4 corners you’ll need to
put those tracking markers back on the screen so you have something to
grab onto. It is definitely possible to go back and forth between which
corners you track throughout a shot, but it complicates things a bit.
Try to keep it simple in camera if possible.
Put these tips into practice
Next time you are shooting with the intention of replacing a screen your compositor will thank you if you use these tips! Of course if you are still having trouble tracking and compositing screen content into your shots, you can always